Now offering AI-powered website development services in Dubai — Explore AI automation services in Dubai
الرئيسية  /  المدوّنة  /  Website Redesign SEO Migration Checklist: Keep Rankings and Grow
ملاحظات من الميدان

Website Redesign SEO Migration Checklist: Keep Rankings and Grow

A phase-by-phase website redesign SEO migration checklist — pre-launch benchmarking, architecture, 301 redirect mapping, staging audits, launch day and recovery.

A website redesign is an exciting milestone for any business. It promises a sleek new interface, better user experience, and upgraded functionality. However, for SEO professionals and website owners, a redesign can also be a source of intense anxiety. If executed poorly, a sparkling new website can trigger a catastrophic drop in organic traffic, effectively wiping out years of hard-earned search engine visibility.

The key to surviving this transition isn't luck; it is meticulous planning. Following a comprehensive website redesign seo migration checklist is the only definitive way to ensure that your site not only retains its current rankings but is perfectly positioned to grow post-launch.

Whether you are simply updating your site's visual theme, migrating to a new Content Management System (CMS), or completely restructuring your digital presence, the risks remain the same. Search engines have mapped your current site. They understand its architecture, value its content, and trust its authority. When you change that structure without providing a clear roadmap, search engines get lost—and your traffic plummets.

This ultimate guide will walk you through every critical phase of a site migration. From pre-launch audits to post-launch troubleshooting, we will cover the exact steps you need to take.

Phase 1: Pre-Migration Planning and Benchmarking

The biggest mistake developers and marketers make during a redesign is treating SEO as an afterthought. SEO must be integrated into the redesign process from day one. Before a single line of code is written or a new mockup is approved, you must understand exactly where your website currently stands.

1. Crawl Your Existing Website

To understand what you are migrating, you need a complete inventory of your current website. Use an enterprise-level crawler like Screaming Frog SEO Spider, Sitebulb, or DeepCrawl to spider your entire live site.

Save this crawl data securely. You will need it later to cross-reference against your new site. Ensure your crawl captures:

  • All indexable and non-indexable URLs.
  • Current title tags, meta descriptions, and header tags (H1, H2).
  • Canonical tags and hreflang attributes.
  • Internal linking data.
  • In-links and out-links for every page.

2. Benchmarking Current Search Engine Rankings

You cannot measure the success (or failure) of a migration if you do not have a baseline. Benchmarking current search engine rankings is a non-negotiable step.

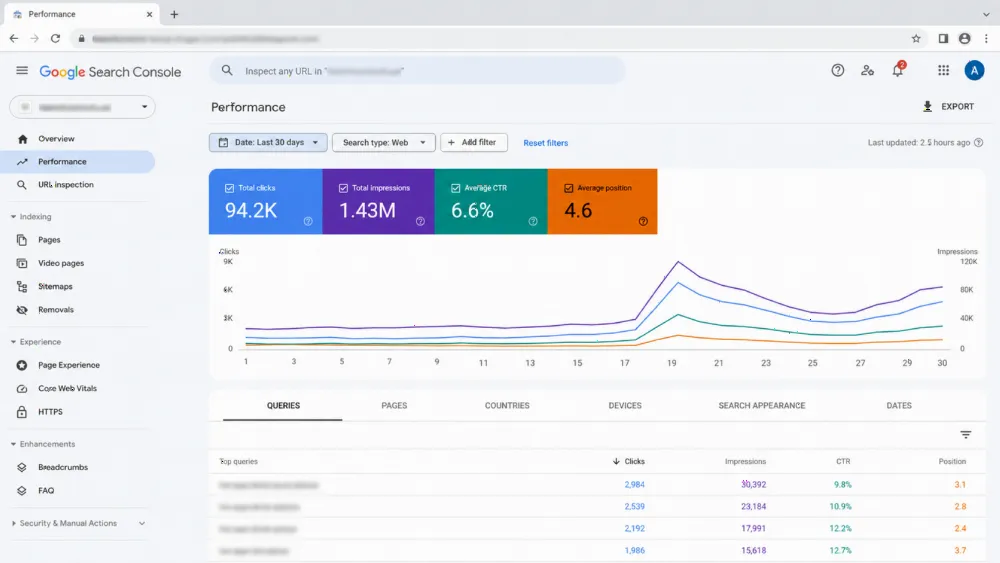
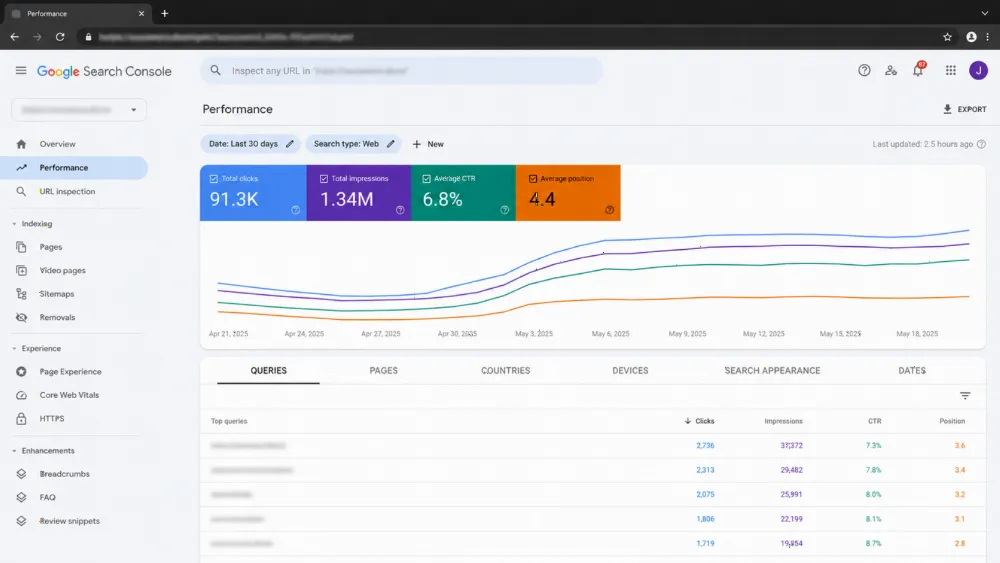
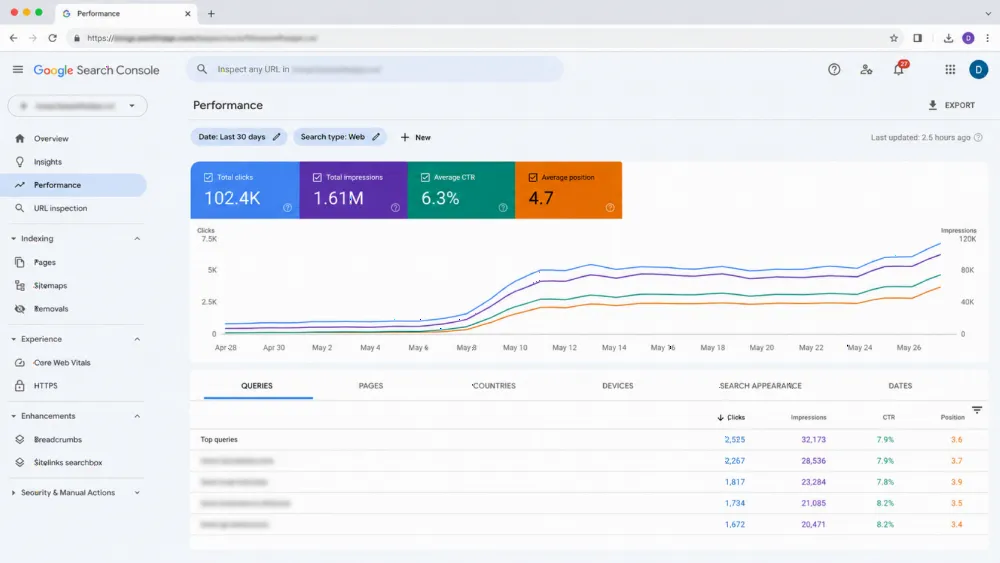
Use tools like Semrush, Ahrefs, or Google Search Console to record your current performance. Document the following metrics:

  • Keyword Rankings: Export your top-ranking keywords, noting their current positions and the specific landing pages they trigger.
  • Organic Traffic: Record your average monthly, weekly, and daily organic traffic over the past 12 months to account for seasonality.
  • Conversion Rates: Note the organic conversion rates for your top-performing pages.
  • Site Speed: Run your core pages through Google PageSpeed Insights and document your Core Web Vitals scores.

By establishing these baselines, you will know exactly what "normal" looks like, making it much easier to spot discrepancies after the new site goes live.

3. Preserving High-Performing Content During Migration

Not all pages on your website are created equal. Often, a small percentage of your pages drives the vast majority of your organic traffic and revenue.

Dive into Google Analytics and Google Search Console to identify your "VIP" pages. These are pages with the highest traffic, the most backlinks, or the best conversion rates. Preserving high-performing content during migration requires strict oversight. When reviewing the new wireframes and site architecture, ensure these specific pages:

  • Are carried over to the new site.
  • Do not lose their primary keywords in the H1s or Title Tags.
  • Maintain their depth in the site architecture (e.g., if a top page is currently one click from the homepage, it shouldn't be buried four clicks deep on the new site).

Phase 2: Site Architecture and Content Strategy

A redesign is the perfect opportunity to clean house. Over time, websites accumulate dead pages, outdated blog posts, and convoluted navigation paths. However, altering your site architecture fundamentally changes how search engine bots crawl and understand your site.

1. Best Practices for Content Pruning Strategy

You shouldn't automatically migrate every single page from your old site to your new one. Pages that offer no value to users or search engines can drag down your overall site quality. Implementing best practices for content pruning strategy involves categorizing your existing pages into four buckets:

  • Keep: High-traffic, high-value, or legally required pages. Migrate these as-is.
  • Improve: Pages that have potential but currently underperform. Migrate these but schedule them for a content refresh.
  • Consolidate: Multiple pages that target the same intent (keyword cannibalization). Merge these into one comprehensive, authoritative page.
  • Delete (and Redirect): Thin, outdated, or irrelevant pages with no traffic and no backlinks. Remove them, but ensure you redirect their URLs to the most relevant active page.

2. Evaluating the Impact of Site Architecture on Crawl Budget

Search engines allocate a specific "crawl budget" to your site—the number of pages they are willing and able to crawl within a given timeframe.

During a redesign, pay close attention to the impact of site architecture on crawl budget. If your new design introduces a massive number of faceted navigation URLs (common in e-commerce), infinite scroll pagination without proper standard pagination fallbacks, or excessively deep sub-folders, Googlebot may fail to crawl your most important pages.

Aim for a "flat" architecture. As a general rule, every critical page on your website should be accessible within three to four clicks from the homepage. Utilize HTML sitemaps and optimized footer links to distribute page rank efficiently.

3. Internal Link Structure Optimization

Internal links are the pathways search engines use to discover new content and understand the hierarchy of your site. During a redesign, these pathways are frequently destroyed.

Internal link structure optimization must be planned meticulously.

  • Navigation Menus: Ensure your main header and footer navigation link to your core category pages.
  • Breadcrumbs: Implement structured breadcrumbs on the new site. This not only aids user navigation but provides search engines with crystal-clear site hierarchy clues.
  • In-content Links: When migrating blog posts or informational pages, ensure the contextual links within the body text are updated to point to the new destination URLs, rather than relying on redirects.

Phase 3: The Holy Grail – 301 Redirects

If there is one section of this website redesign seo migration checklist that determines life or death for your organic traffic, it is your redirect strategy.

When you change a URL, the old URL essentially dies. Anyone (or any search engine) trying to visit that old URL will hit a 404 "Page Not Found" error. To search engines, a 404 means the content is gone, and they will promptly remove it from their index. To prevent this, you must use 301 (permanent) redirects.

1. Developing a 301 Redirect Mapping Strategy

A flawless 301 redirect mapping strategy is your insurance policy against traffic loss. This is the process of matching every single URL from your old site to its corresponding URL on the new site.

Step-by-Step Mapping:

  1. Gather All Old URLs: Combine your Screaming Frog crawl data, Google Analytics landing page reports (set to the last 12 months), Google Search Console URL data, and Ahrefs/Semrush backlink data. Remove duplicates. This is your master list of legacy URLs.
  2. Gather All New URLs: Extract a list of all planned URLs for the new website.
  3. Map 1-to-1: Open a spreadsheet. In Column A, place your old URLs. In Column B, match them to the exact equivalent on the new site.
  4. Map Categories for Deleted Content: If an old page is being deleted and doesn't have an exact equivalent, map it to the closest parent category. (e.g., If old-site.com/services/fax-machine-repair is deleted, redirect it to new-site.com/services/office-equipment-repair).
  5. Avoid Redirecting Everything to the Homepage: Do not be lazy and redirect all deleted pages to the homepage. Google treats these as "soft 404s," and they pass no SEO value.

2. Maintaining Backlink Profile During Domain Change

If your redesign also involves changing your domain name (e.g., rebranding from company.com to newcompany.com), your redirect map is even more critical.

Your backlink profile is arguably your most valuable SEO asset. Maintaining backlink profile during domain change requires ensuring that every URL on your old domain that has inbound links pointing to it is 301 redirected to the corresponding page on the new domain.

Pro Tip: Run a backlink audit on your old domain. Identify the top 100 most linked-to pages. Manually verify that the redirects for these specific pages are 100% accurate. Furthermore, if you have relationships with the webmasters of high-authority sites linking to you, reach out and ask them to update the link to your new domain directly. While a 301 redirect passes value, a direct link is always superior.

3. Avoiding Redirect Chains and Loops

A redirect chain occurs when URL A redirects to URL B, which then redirects to URL C. A loop occurs when URL A redirects to URL B, which redirects back to URL A.

Both scenarios waste crawl budget and dilute SEO equity. As you build your mapping file, ensure every old URL points directly to its final destination. Update any legacy redirects from past migrations to point straight to the new site URLs.

Phase 4: Staging Site Testing and Technical Audits

Long before launch day, your new website will live in a staging environment—a private server where developers build and test the site. This phase is where SEOs must conduct rigorous testing. Discovering a technical flaw on a staging site is an easy fix; discovering it a week after launch is a crisis.

1. Staging Site vs Live Site Testing

The golden rule of staging environments is that they must remain hidden from search engines while mimicking the live environment as closely as possible.

In staging site vs live site testing, you must ensure that your staging server is properly blocked. The most secure way to do this is via server-level HTTP authentication (requiring a username and password to access). Alternatively, you can block the entire staging site using the robots.txt file by adding User-agent: * Disallow: /

Warning: You must remember to remove this block when pushing the site live, or your new site will instantly de-index.

2. Conducting a Pre-Launch Technical SEO Audit

Treat the staging site as if it were a brand-new client you are auditing for the first time. A comprehensive pre-launch technical seo audit ensures the underlying code is healthy.

Crawl the Staging Site: Configure your crawler to bypass the staging authentication and crawl the new site. Compare this crawl to the baseline crawl of your old site.

Check On-Page Elements:

  • Title Tags and Meta Descriptions: Did they migrate successfully? Are they missing, duplicated, or truncated?
  • Heading Structure: Does every page have a single H1? Are H2s and H3s used logically?
  • Image Alt Text: Did image alt attributes carry over during the CMS migration?

Check Technical Elements:

  • Mobile Responsiveness: Google uses mobile-first indexing. Your new site must perform flawlessly on mobile devices. Check for viewport meta tags and responsive design elements.
  • Structured Data (Schema Markup): Redesigns often strip out custom JSON-LD schema markup. Validate the staging pages using Google's Rich Results Test tool to ensure your product, local business, or article schema is intact.
  • JavaScript SEO: If the new site relies heavily on JavaScript (e.g., React, Angular, Vue.js), ensure that critical content and links are rendered in the HTML DOM so search engines can read them without executing complex scripts.

3. Validating Canonical Tags on New Pages

Canonical tags tell search engines which version of a page is the "master" copy, preventing duplicate content issues. During a redesign, dynamic URLs or incorrect CMS settings can wreak havoc on these tags.

Validating canonical tags on new pages is paramount. Ensure that:

  • Every page has a self-referencing canonical tag (unless it is an intentional duplicate).
  • Canonical tags use absolute URLs (e.g., https://www.yoursite.com/page) rather than relative URLs (e.g., /page).
  • The canonical tags match the final destination of your 301 redirects.

Phase 5: Launch Day Operations

Launch day is when the rubber meets the road. All your planning converges into a few highly stressful hours. To manage this effectively, follow a strict launch day website redesign seo migration checklist.

1. The Migration Window

Choose your launch window strategically. Do not launch on a Friday afternoon or before a major holiday. Launch during a low-traffic period (often late at night or early morning) early in the week. This ensures your development and SEO teams are available to immediately jump on any critical errors.

2. Lift the Shields

As the DNS switches over and the new site goes live, your first task is to remove the staging barriers.

  • Remove HTTP authentication.
  • Update the robots.txt file to allow search engine crawling. Make sure you don't accidentally push the staging Disallow: / command to the live environment.

3. Implement and Test the 301 Redirects

As soon as the site is live, the 301 redirects must be activated on the server. Do not wait hours or days to implement them.

Open the master redirect spreadsheet you created in Phase 3. Take a sample of your most critical legacy URLs and paste them into your browser. Do they resolve to the correct new page? Use a bulk URL status code checker (like Screaming Frog's List Mode) to run your entire list of old URLs. Every single one should return a 301 status code followed by a 200 OK for the new destination URL. If you see 404 Not Found or 500 Server Error, halt and escalate to development immediately.

4. Updating XML Sitemaps and Robots.txt

Your XML sitemap acts as a roadmap for Googlebot. Updating XML sitemaps and robots.txt is a critical launch day task.

  • New Sitemap: Generate a new XML sitemap containing only the fresh, 200-status URLs of your new website. Submit this immediately via Google Search Console and Bing Webmaster Tools.
  • Old Sitemap (Pro Tip): Do not delete your old XML sitemap right away. Submit both the old sitemap and the new sitemap to Google Search Console. Why? Submitting the old sitemap forces Google to crawl your legacy URLs rapidly, allowing them to discover the 301 redirects much faster. Once Google has crawled and processed the redirects (usually after a few weeks), you can remove the old sitemap.
  • Robots.txt: Ensure your updated robots.txt file references the URL of your new XML sitemap at the very bottom.

5. Google Search Console Address Change Tool

If your redesign included a change of domain (e.g., moving to a new top-level domain or rebranding entirely), you must explicitly tell Google about the move.

Log into Google Search Console, navigate to the property of your old domain, and use the Google Search Console address change tool. This tool sends a strong signal to Google that the site has permanently moved, accelerating the transfer of indexing and ranking signals to the new domain. Note: This tool is only necessary for domain changes, not for redesigns remaining on the same root domain.

Phase 6: Post-Migration Monitoring and Recovery

You might think the job is done once the site is live, but the weeks following a redesign are the most critical. Search engines need time to digest the massive structural changes. Fluctuations in rankings are entirely normal, but severe drops indicate a problem.

1. How to Prevent Organic Traffic Loss Immediately Post-Launch

The best defense is a good offense. Knowing how to prevent organic traffic loss comes down to vigilant monitoring in the first 48 to 72 hours.

  • Monitor Google Search Console Error Reports: Keep a close eye on the "Pages" report (formerly Coverage) in GSC. Look for spikes in 404 Not Found, Soft 404, or Server Error (5xx) issues.
  • Real-Time Analytics: Watch Google Analytics real-time traffic. Are users interacting with the site? Are they completing conversions, or are they bouncing rapidly due to broken functionality?
  • Crawl the Live Site Again: Run another full crawl of the live environment. Compare this to your staging crawl. Did any settings change during deployment? Ensure canonical tags, noindex tags, and internal links are functioning perfectly.

2. Post-Migration Performance Monitoring Tools

To effectively track your recovery and growth, you need to rely on sophisticated post-migration performance monitoring tools.

  • Rank Tracking: Use tools like Semrush, Ahrefs, or Advanced Web Ranking to monitor the keyword baseline you established in Phase 1. Expect volatility (the "Google Dance") for a few weeks, but watch for keywords that drop entirely out of the top 100.
  • Log File Analyzers: Tools like Screaming Frog Log File Analyser or Splunk can read your server logs. This tells you exactly how often Googlebot is crawling your new site, which pages it's visiting, and if it is getting stuck in redirect loops.
  • Uptime Monitoring: Set up Datadog, Pingdom, or UptimeRobot. Redesigns can introduce server instability. If your site goes down frequently in the weeks following a launch, Google will drastically reduce its crawl rate.

3. Recovering From SEO Ranking Drops

Despite your best efforts, you may experience a dip in traffic. Do not panic immediately; standard volatility can take 2 to 4 weeks to settle. However, if your traffic drops by 20% or more and stays down for over three weeks, you are in a recovery scenario.

Recovering from seo ranking drops requires methodical troubleshooting rather than guessing.

Diagnosis Checklist:

  1. Check the Redirects Again: 90% of post-migration drops are caused by broken or improperly implemented 301 redirects. Re-run your legacy URLs. Have they dropped? Are they caching incorrectly?
  2. Evaluate Content Parity: Did the redesign strip out crucial on-page text? If a page previously had 1000 words of deeply informative content and now only has a 200-word summary and a sleek image, it has lost its topical relevance. You must restore the content depth.
  3. Investigate Page Speed: Heavy visual redesigns often ruin page speed. If your new high-resolution video headers are pushing your Largest Contentful Paint (LCP) to 8 seconds, your rankings will suffer. Optimize images, minify CSS/JS, and utilize a Content Delivery Network (CDN).
  4. Examine Internal Linking: Did the new site architecture bury your best pages? If a previously highly-linked page now takes five clicks to reach, Google will assume it is no longer important. Re-optimize your internal linking structure to funnel authority to your core money pages.
  5. Check Indexation: Is Google actually indexing the new pages? Check GSC to ensure your newly submitted sitemap is being processed without errors.

Managing Expectations Across the Organization

An often-overlooked aspect of a website redesign seo migration checklist is human communication. SEO specialists must set realistic expectations with stakeholders, executives, and clients.

When a redesign launches, business owners expect instant, magical results. They want the shiny new site to immediately double their traffic. It is your job to educate them that a migration is a defensive maneuver first, and an offensive strategy second.

Explain that a temporary dip in traffic is a normal part of the process as search engines re-crawl and re-evaluate millions of lines of code. By setting these expectations early, you buy yourself the necessary time to monitor, tweak, and optimize the site post-launch without executives breathing down your neck.

Furthermore, ensure tight alignment between the SEO team and the web development team. SEOs shouldn't be handed a finished site a week before launch and asked to "SEO it." The technical seo requirements (like maintaining URL structures, implementing breadcrumbs, and optimizing site speed) must be written into the developers' acceptance criteria during the earliest sprint planning sessions.

The Long-Term Benefits of a Well-Executed Migration

If you strictly follow this website redesign seo migration checklist, you will not only prevent disaster—you will set the foundation for unprecedented growth.

A successful redesign typically resolves legacy technical debt. It removes bloated code, eliminates duplicate content loops that have been plaguing the site for years, and streamlines the user experience. Once the initial volatility settles, search engines will reward this cleaner, faster, and more logical architecture.

Within three to six months post-launch, a properly migrated site should not just recover its old baseline but surpass it, capturing new keyword rankings and achieving higher conversion rates.

Summary Checklist

To wrap up, keep this condensed checklist handy as you move through your project phases:

Pre-Migration:

  • Crawl the existing live site and save the data.
  • Conduct benchmarking for keyword rankings, organic traffic, and conversions.
  • Identify high-performing pages that must be preserved.
  • Finalize the content pruning strategy (Keep, Improve, Consolidate, Delete).

Preparation & Architecture:

  • Review the new site architecture for crawl budget optimization.
  • Map out an optimized internal linking strategy (breadcrumbs, silos).
  • Create a comprehensive 1-to-1 301 redirect mapping document.
  • Plan the strategy for maintaining the backlink profile (especially for domain changes).

Staging & Testing:

  • Ensure the staging environment is blocked from search engines.
  • Run a full pre-launch technical SEO audit on the staging site.
  • Validate canonical tags, meta tags, and structured data.
  • Test mobile responsiveness and page speed.

Launch Day:

  • Remove staging blocks (HTTP Auth / robots.txt).
  • Implement all 301 redirects and test them in bulk.
  • Update XML sitemaps and the robots.txt file.
  • Submit the new (and old) sitemaps to Google Search Console.
  • Use the Google Search Console address change tool (if changing domains).

Post-Launch:

  • Monitor real-time analytics to prevent organic traffic loss.
  • Track indexing and crawl errors in Google Search Console.
  • Utilize post-migration performance monitoring tools (Rank trackers, log analyzers).
  • Diagnose and recover from any SEO ranking drops by checking redirects, content parity, and site speed.

A website redesign does not have to be an SEO nightmare. By respecting the intricate relationship between site architecture, content, and search engine crawling behaviors, you can guide your website safely through the transition. Plan meticulously, test ruthlessly on staging, execute precisely on launch day, and monitor vigilantly post-launch. Do this, and your new website will become a powerful engine for organic growth.


Planning a redesign and worried about rankings? WebStackRank runs migrations end-to-end with a technical SEO audit, SEO-friendly web development and ongoing data-driven SEO. For the tool-supported companion version, read Website redesign without losing rankings, or the 2026 deep dive on Core Web Vitals, crawl budget & indexing. Ready to migrate safely? Talk to our team.